11
Hand Fan Footwear Project
Working in a new environment was a big challenge for me. However, these challenges were a much-needed experience to prepare me for what's to come. Even when challenged, I worked around them, stayed true to myself, and worked to keep improving myself.
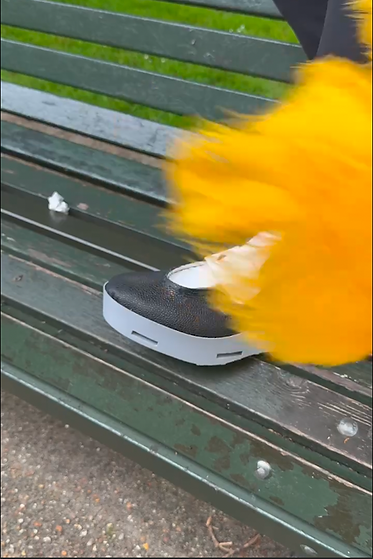
For this project, I worked with the Worshipful Company of Fan Makers to create a contemporary product that would create a wider awareness of the fan, new markets, and ultimately new fan practitioners. I saw the footwear industry as a massive and growing market, which is why I felt that fans would benefit from being integrated into this market. As a result, I created a shoe with removable fan accessories which allow the user to customize their shoes, while at the same time enabling the use of the feather fan if they desire.


Process
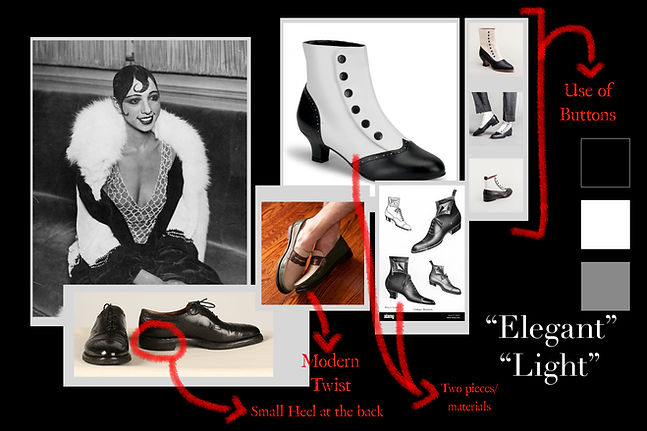

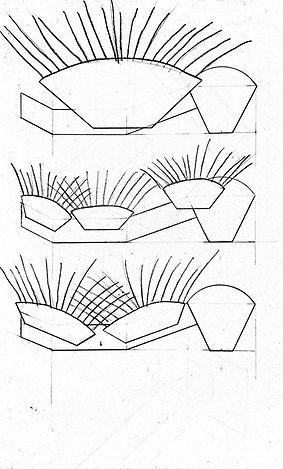
I started the project by creating a mood board for my idea. I was heavily inspired by the 1920s - 1940s Burlesque period, so that played a big part in my design choices. When it came to the shoe, I was inspired by the classiness of the time, as well as the simplicity of it. Due to that, I stuck to that as inspiration but gave it my own modern twist. To contrast the classiness of the shoe, I used colorful feather fans as accessories. The vibrant colors and exaggerated shape took away the attention of the shoe to the fans, similar to how feather fans were the main visual element of the Burlesque shows at the time.


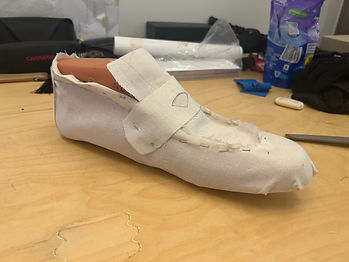
Now that I had my mood boards prepared, I went through a series of different variations of shoes. I chose my three favorites, added color, and presented them for feedback. The penny loafer design was the one that most people liked so I decided to go ahead with that one for the shoe design.


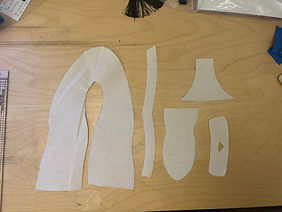

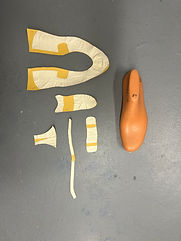
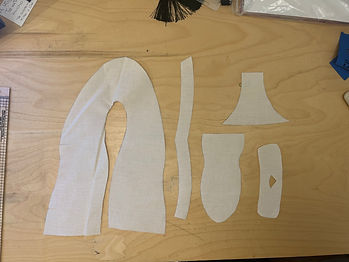

Next came the pattern making. This project I made while studying abroad in London, meant that I was in a completely different environment, so sourcing out tools and materials was a challenge. For that reason, I was only able to receive one shoe last from the school, which meant for this project I was only able to make a half pair. From there I applied all the skills I had learned from the first pair of shoes I made. I felt more comfortable pattern-making this time around, as well as overall feeling that I had improved on my skills.

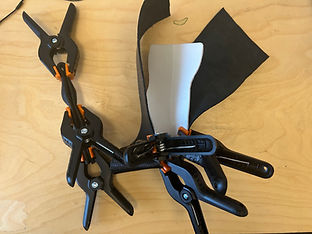


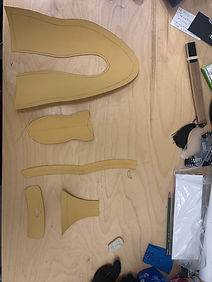
The leather I used this time, however, was much tougher than the one I had used for the first pair of shoes I had made. This time I had learned my lesson, and I spent a couple of days clamping and molding the leather so it would bend easily for when I began constructing the upper.
As mentioned earlier, since I was in a completely different environment, I did not have access to certain machinery that I had back in my home university. In this case, I didn’t have access to the sewing machines. This meant that I had to come up with a solution for creating the upper. Instead of using a sewing machine, I bought a leather-making kit and sewed the whole upper by hand. I used a sewing awl to pierce through the leather and drag the thread across, which was much more time-consuming but was a new skill to learn.


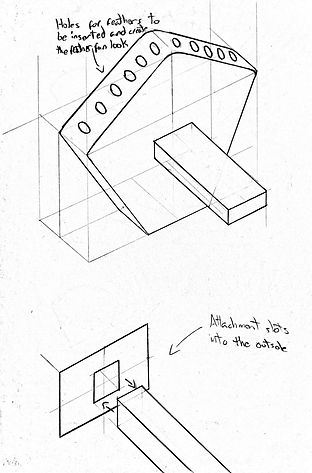
Once the upper was constructed, I moved on to designing the outsole. I wanted a custom outsole that could have attachments inserted into it, meaning I had to create my own rather than outsourcing an outsole. For the design, I went through different variations, as well as designing the attachment for the outsole.

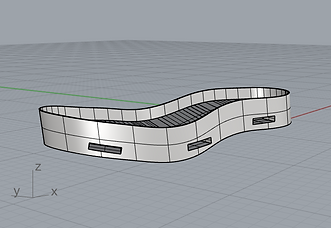
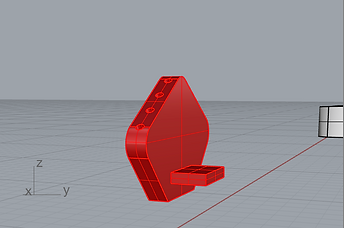

I finalized the design, which meant that now I had to create it. The outsole was made using Rhino, which was a challenge for me, as this was the first time that I had ever used the program. This also meant that I had to reach out to tutors for help. The final model took several days to make. The outsole was created by first scanning the corresponding shoe last to get the exact measurements. The scanned last was used as a reference, from which the surrounding shape was outlined to make sure the outsole would have the same shape. Since the thickness of the leather had to be taken into consideration, the outline had to be edited and offset by around 0.5 cm. After a lot of trial and error, that outline was able to be made into a solid object, to the specific measurements needed. Once that was done, the focus shifted towards making the accessory piece. This model would finally get printed out in PLA material, using 3D printers.